


March 7 is fast approaching. Whether you run a small, large store, website or blog and don’t want to miss out on the opportunities Google offers advertisers, you need to implement Consent Mode 2. 0, a new consent mode that allows you to keep remarketing lists or continue tracking conversions. Below, you will find practical tips that will enable you to carry out the implementation smoothly. So, let’s start!
1. After logging in to the tool available on the website: https://www. cookiebot. com/, add the URL of your domain. Then, adjust the regulations of the processing personal data, in accordance with the regulation of the European Union.
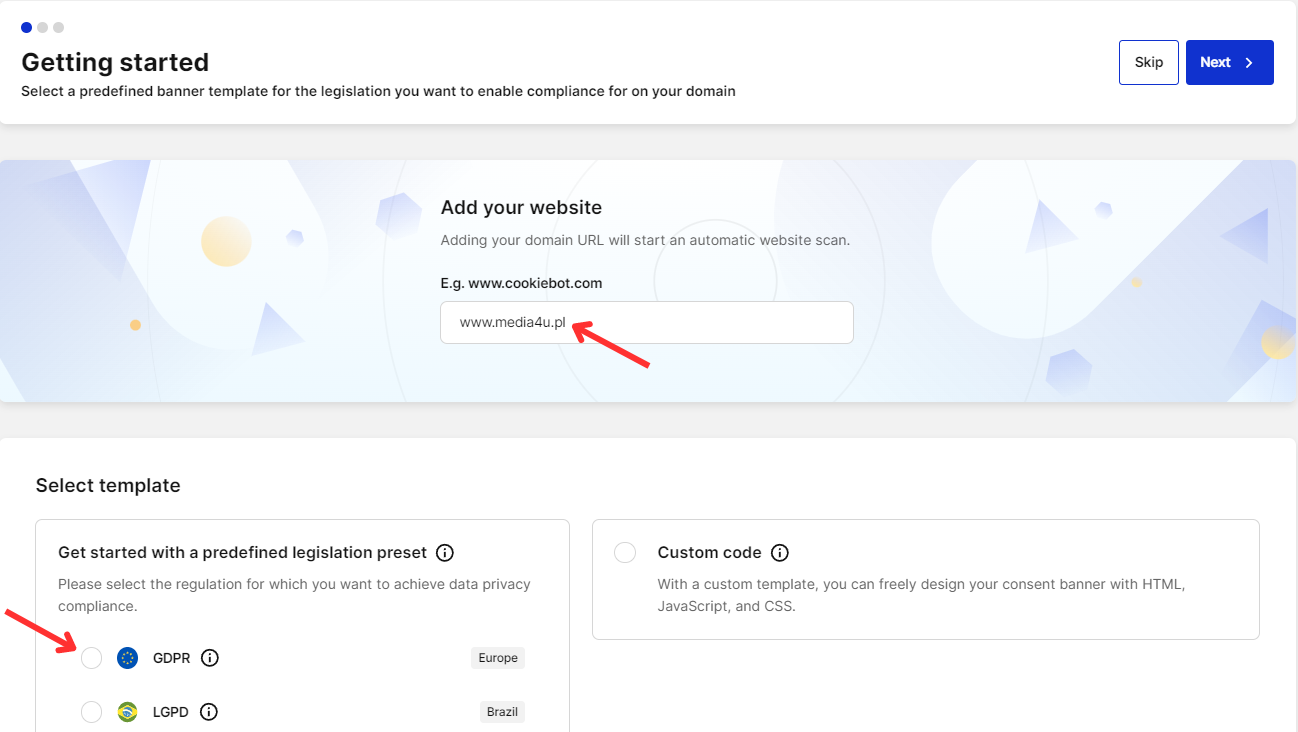
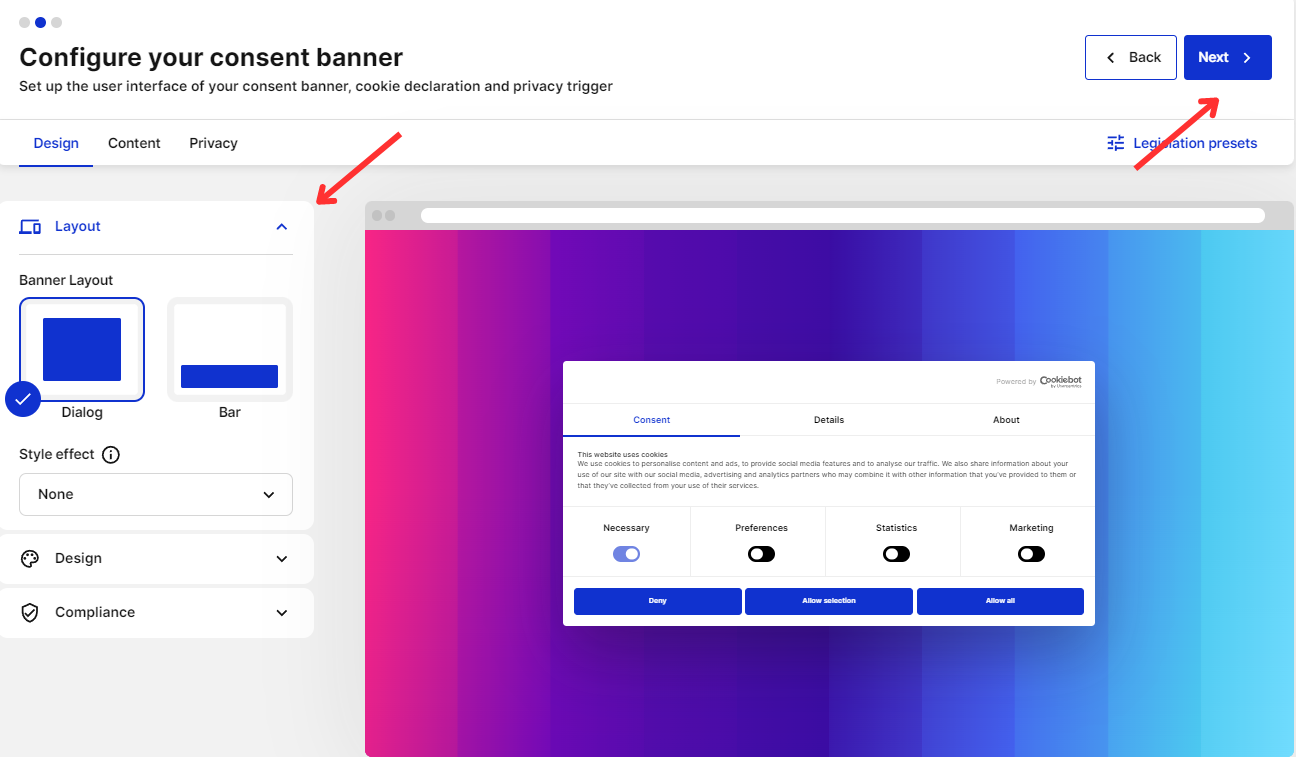
2. In the next step, you can customize the appearance of the new “cookie” banner, which will be displayed to users visiting the website.
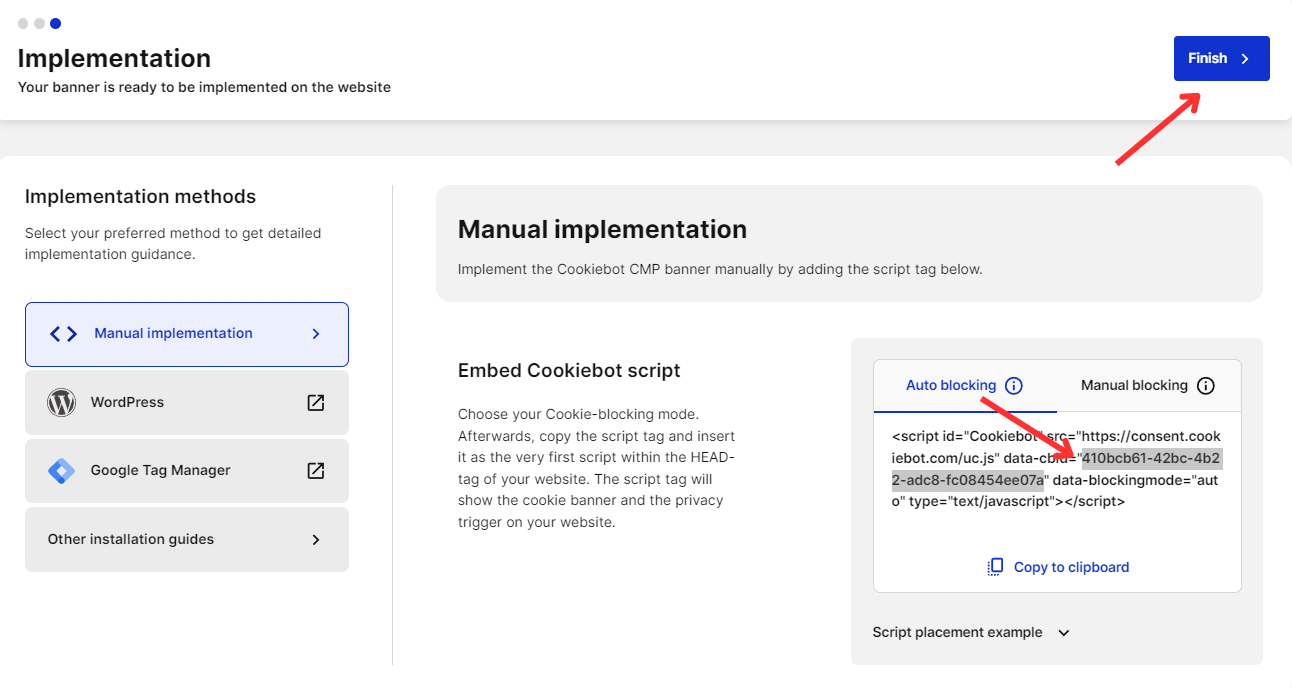
3. Then an automatic code sequence will appear. Copy the given number and confirm with the “Finish” button.
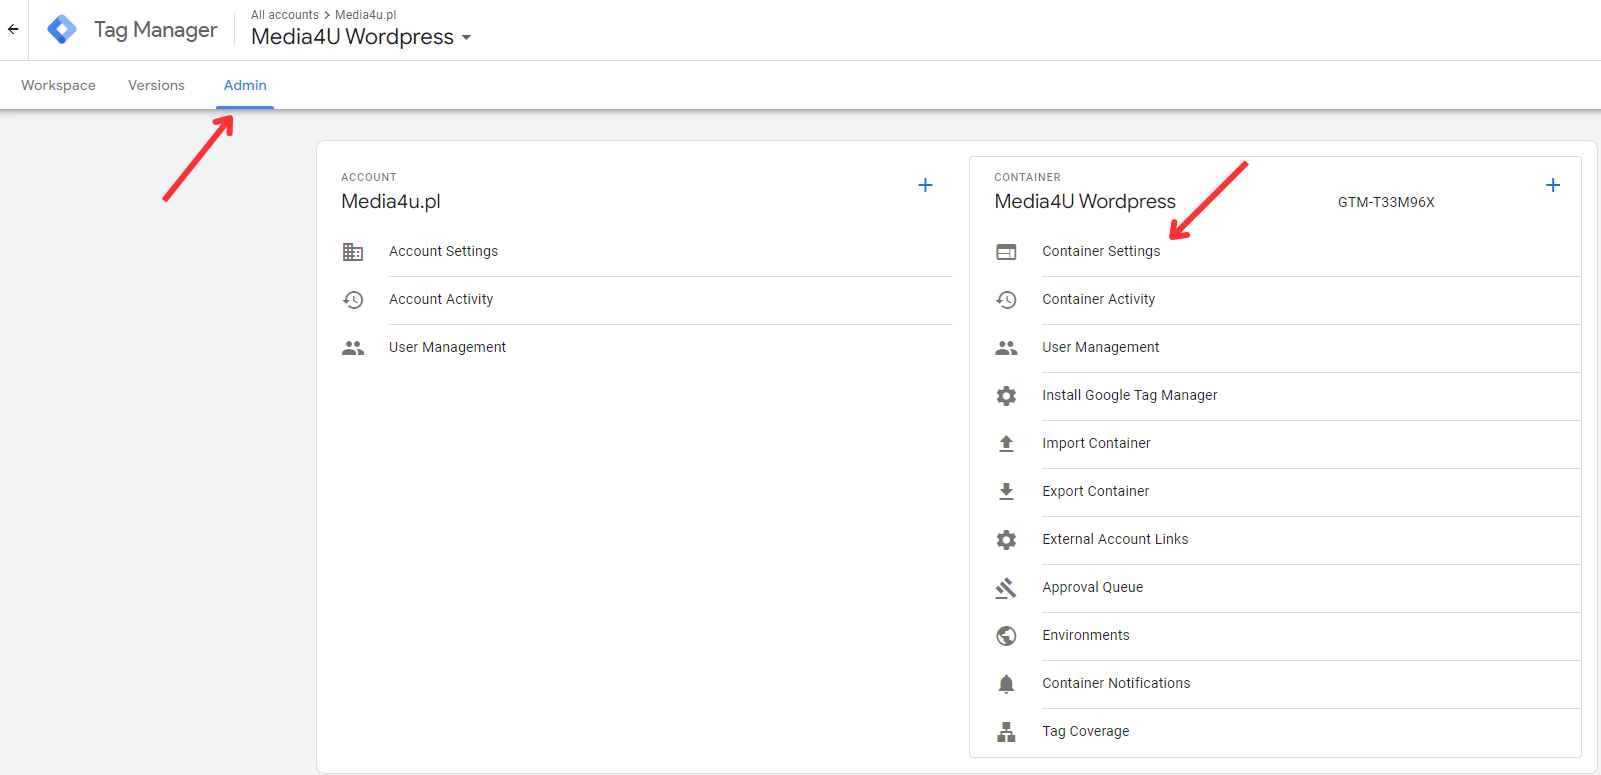
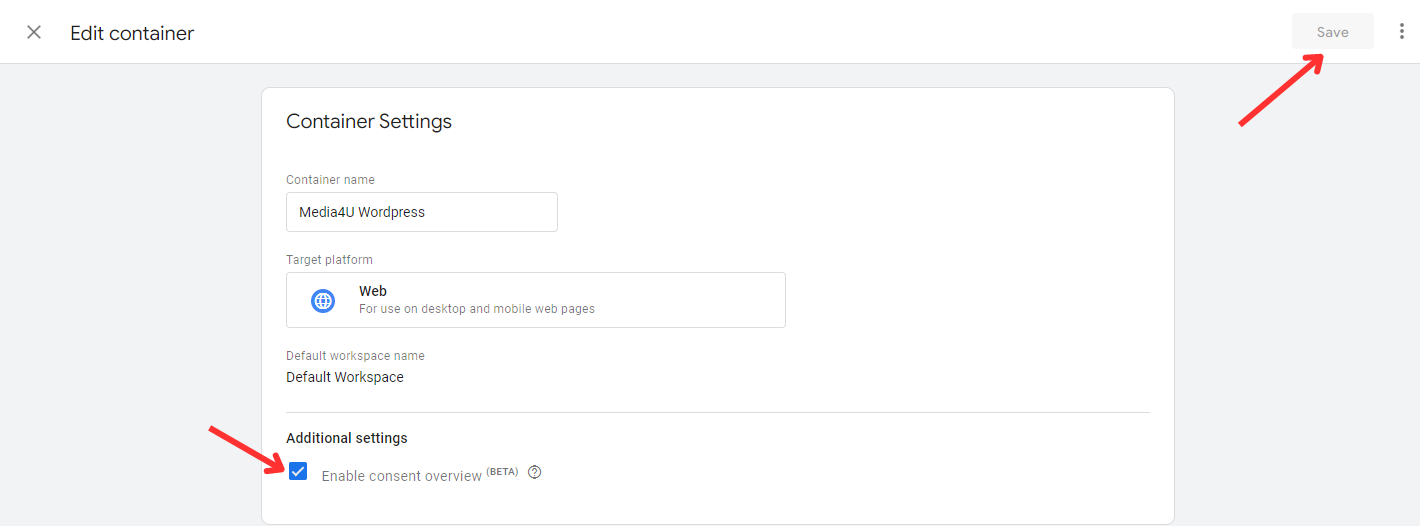
4. Log in to your “Tag Manager” account. From the “Administration” tab, select container settings.
5. In the additional settings, allow you to review the permission settings and save the changes.
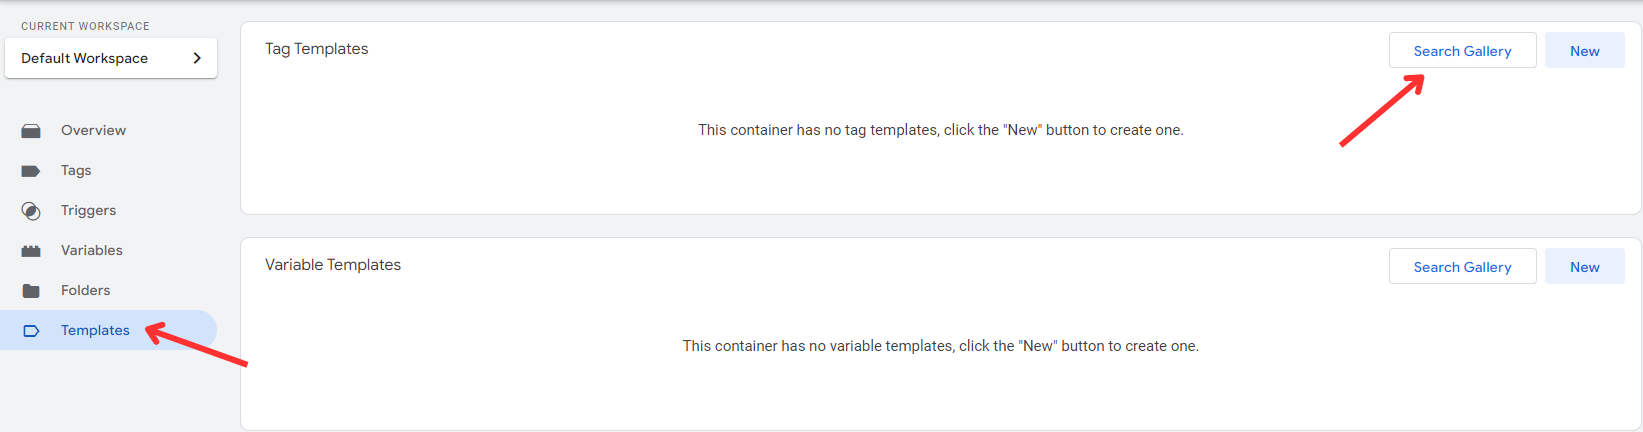
6. Choose the template settings and in the “Tag Templates” section go to the gallery search.
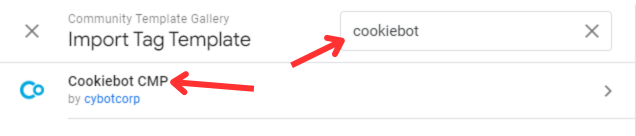
7. Then import the “Cookiebot CMP” template.
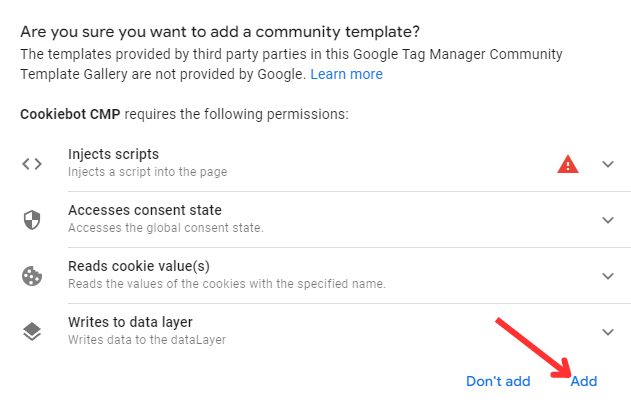
8. Add the selected template to the workspace.

9. Confirm the terms of adding the template. Click the “Add” button.
10. Add a new tag in the “Tags” tab.
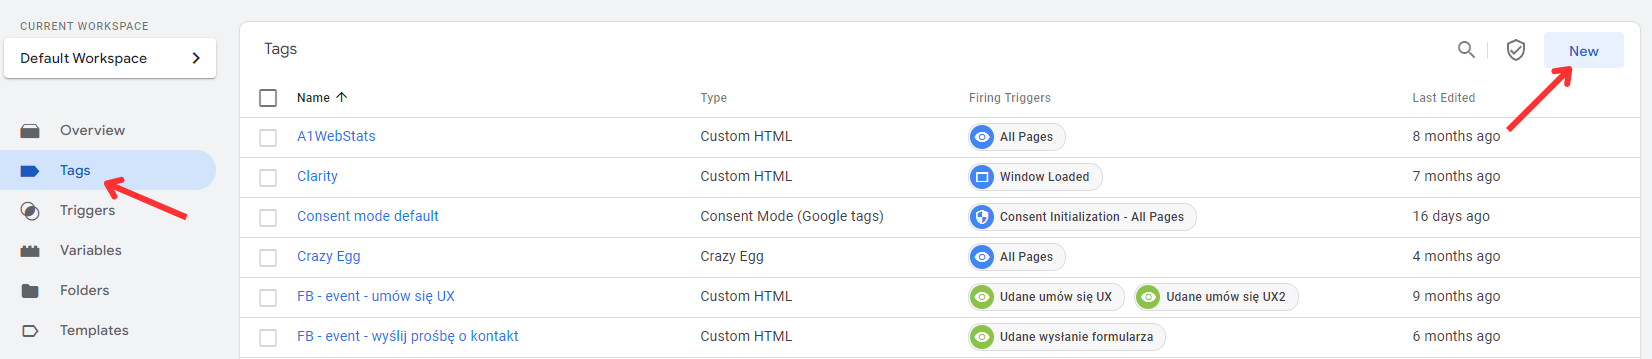
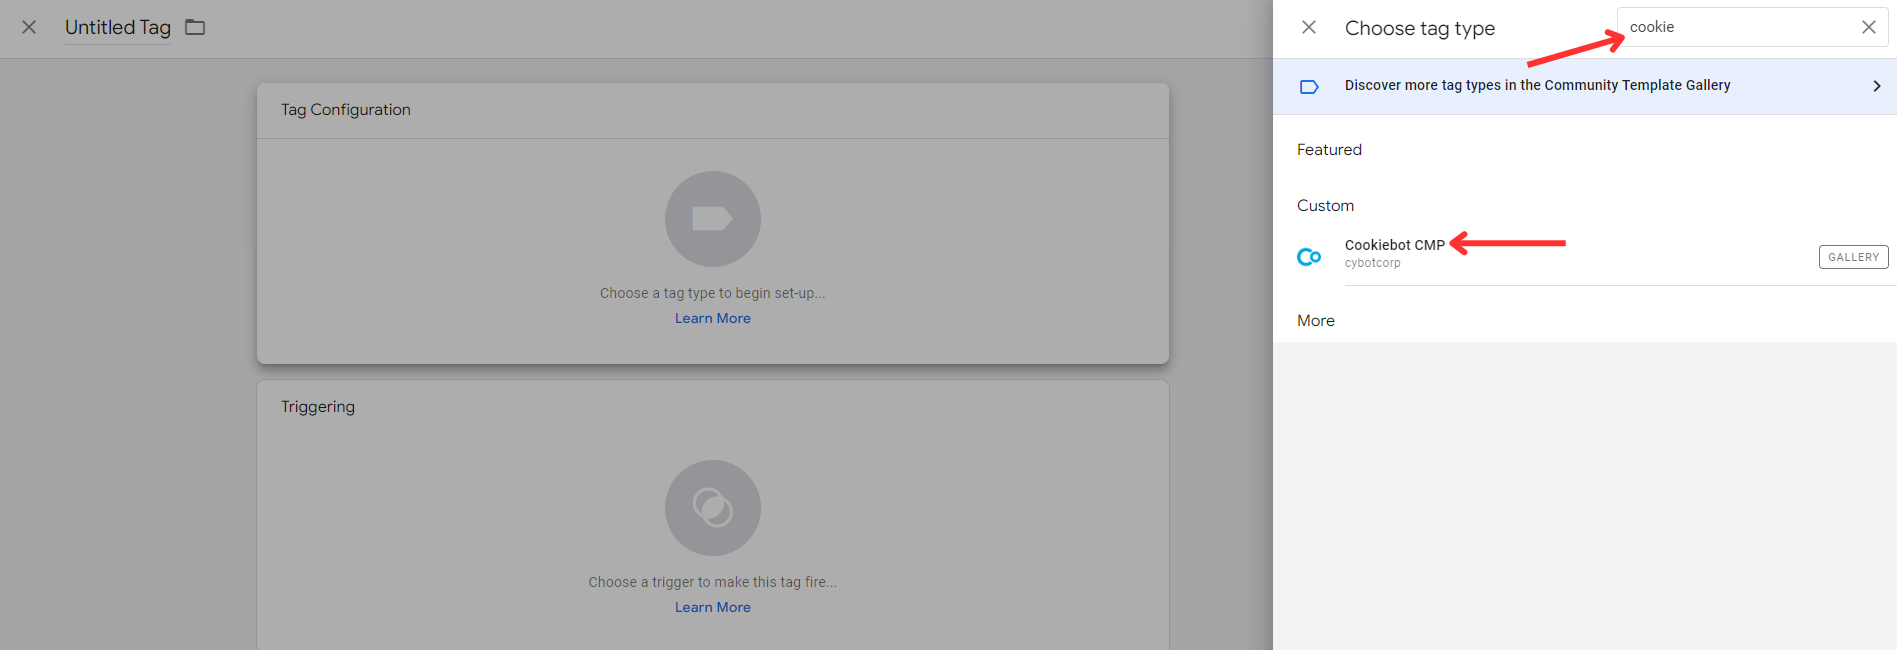
11. Select the type of tag by typing “cookie” and then select “Cookiebot CMP”.
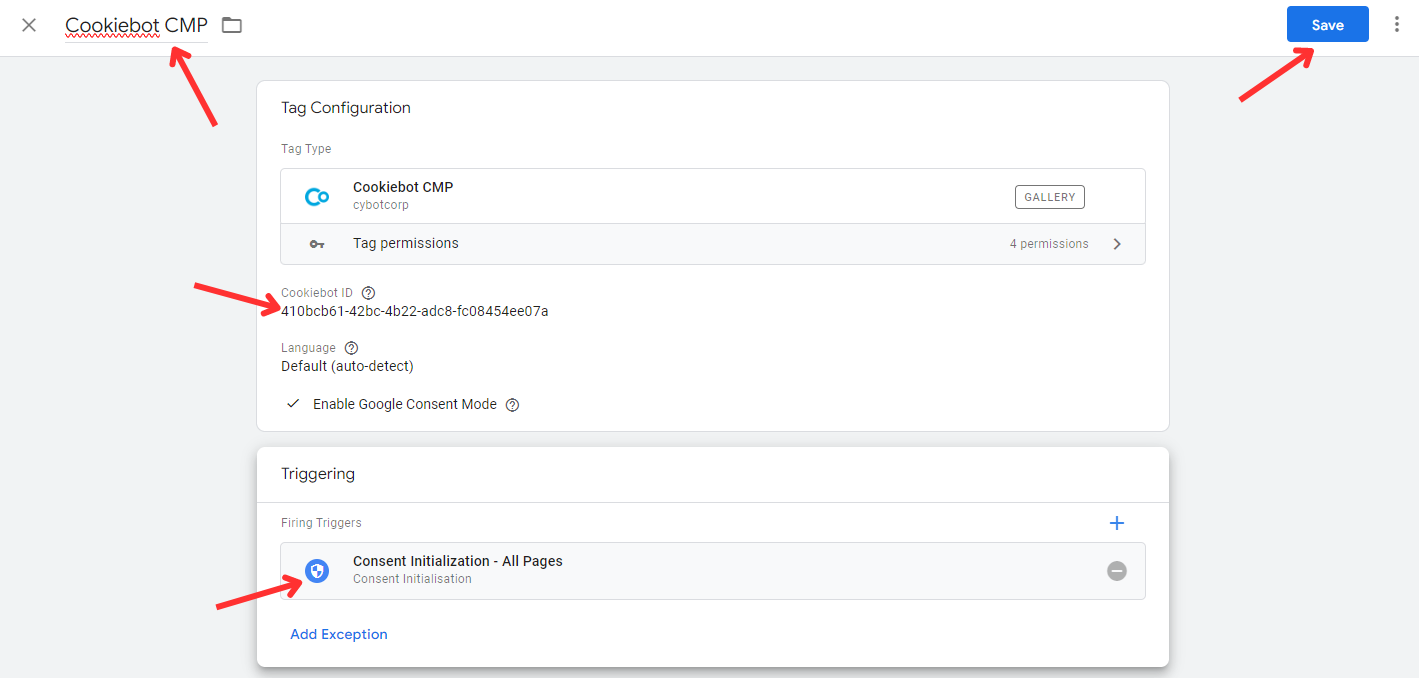
12. Paste the previously copied number, assigning it to “Cookiebot ID”. Then add the rule that is responsible for calling the tag and save the changes.
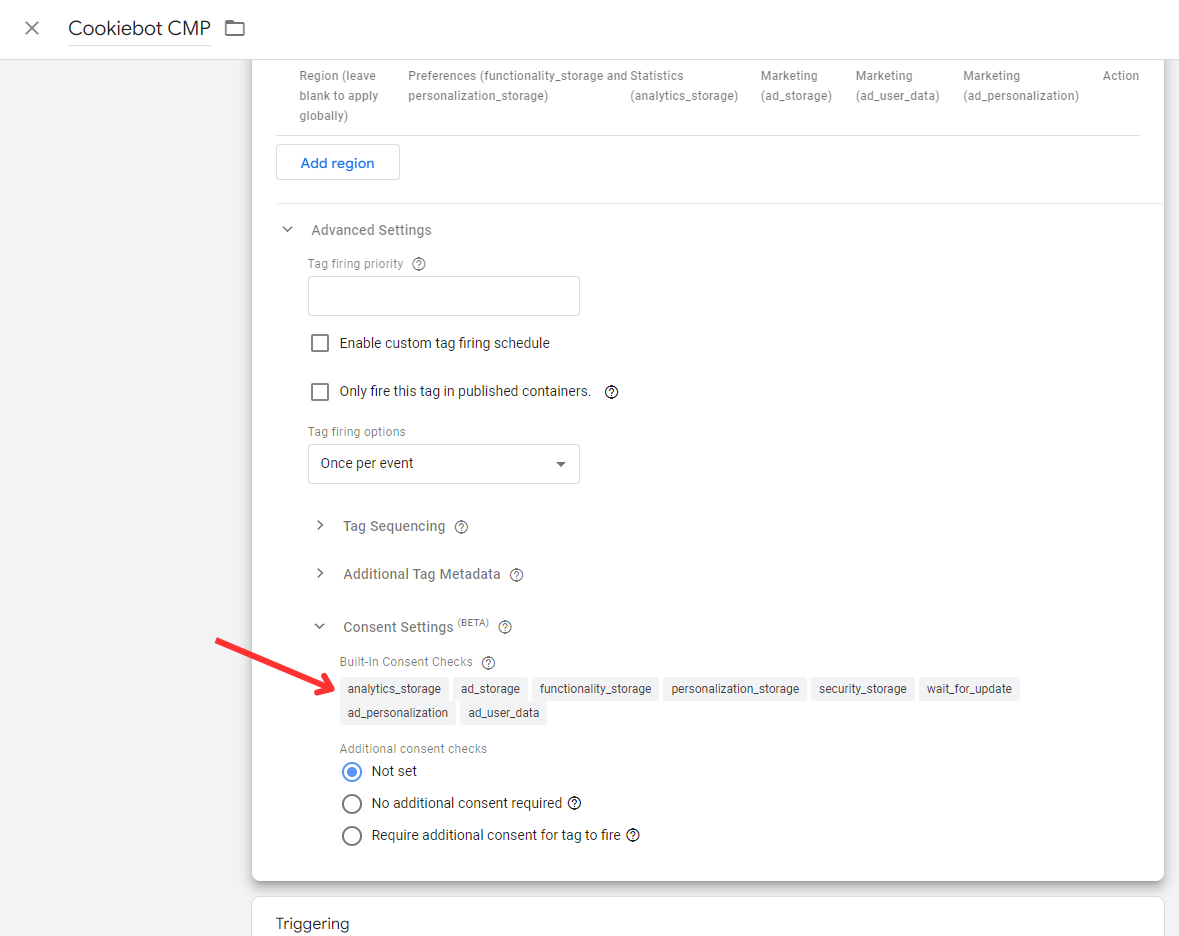
13. Now you can check the built-in consent checks.
14. In the “Tags” section, click on the shield icon that will redirect you to the current permission assigned to tags.
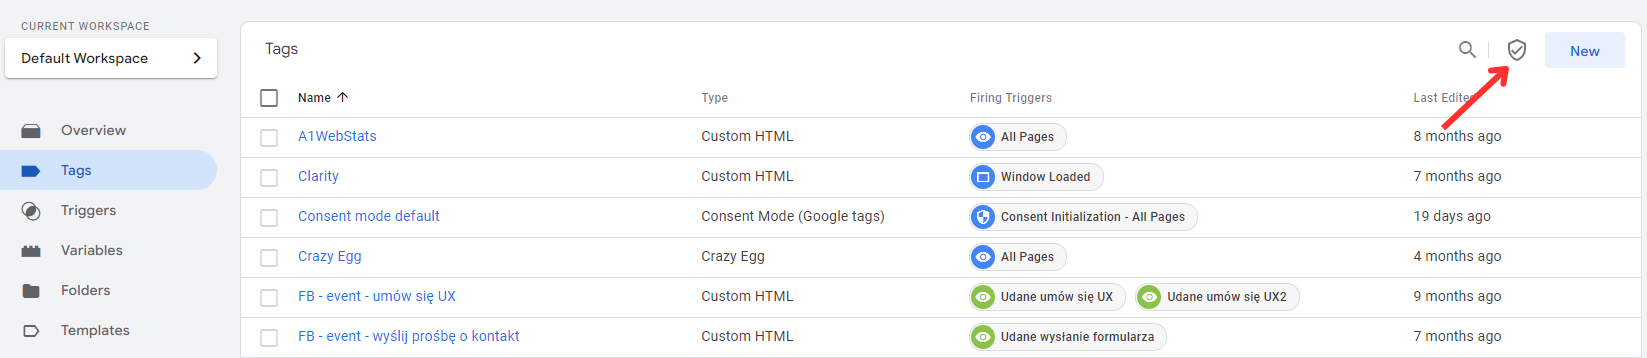
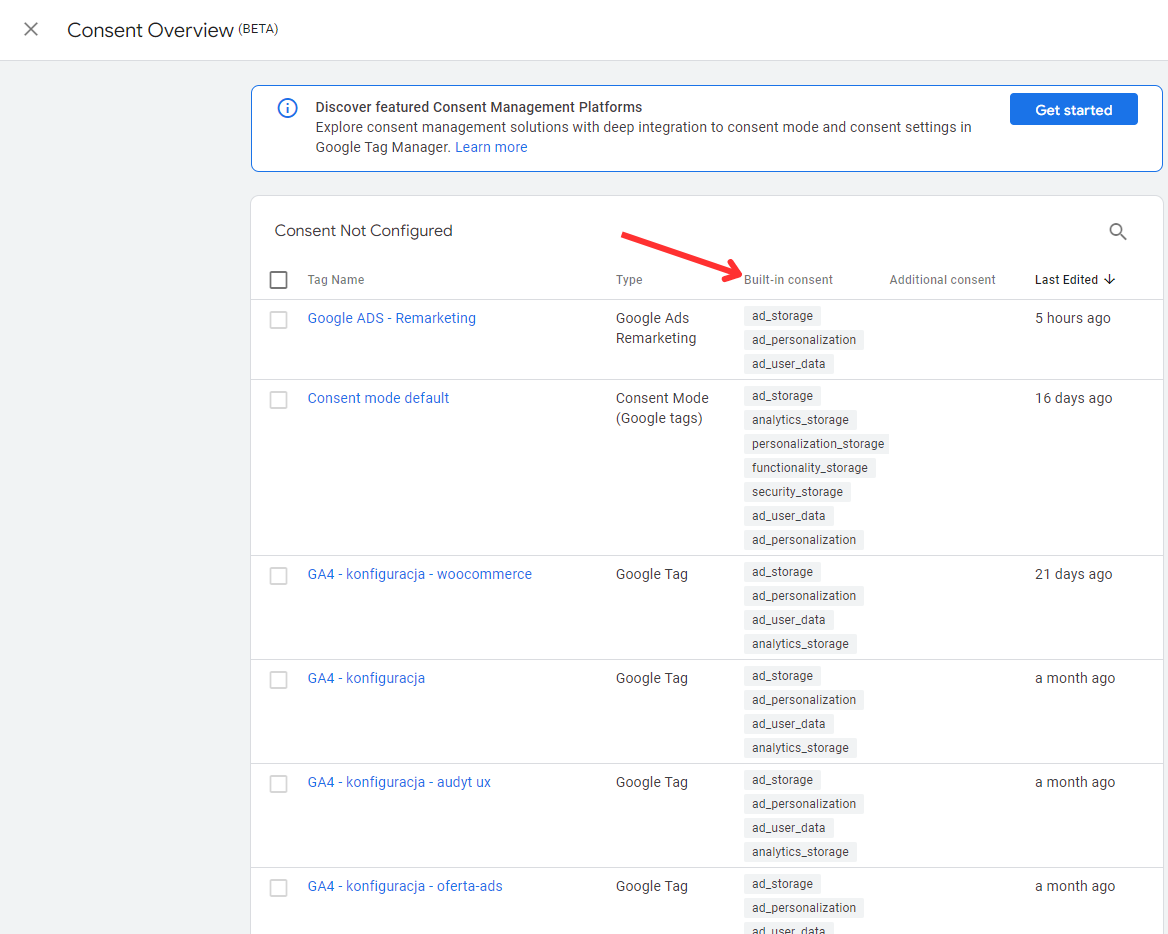
15. Now you can see which tags which built-in permissions have been assigned to.
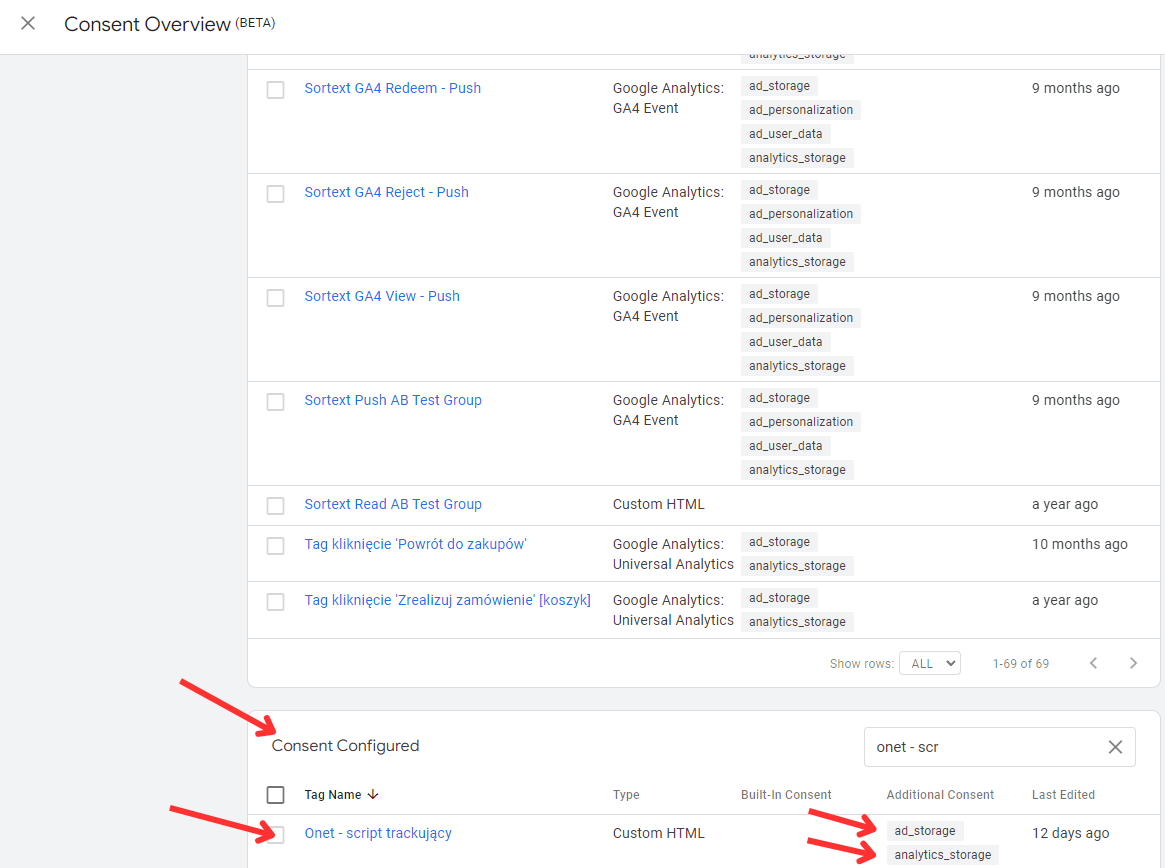
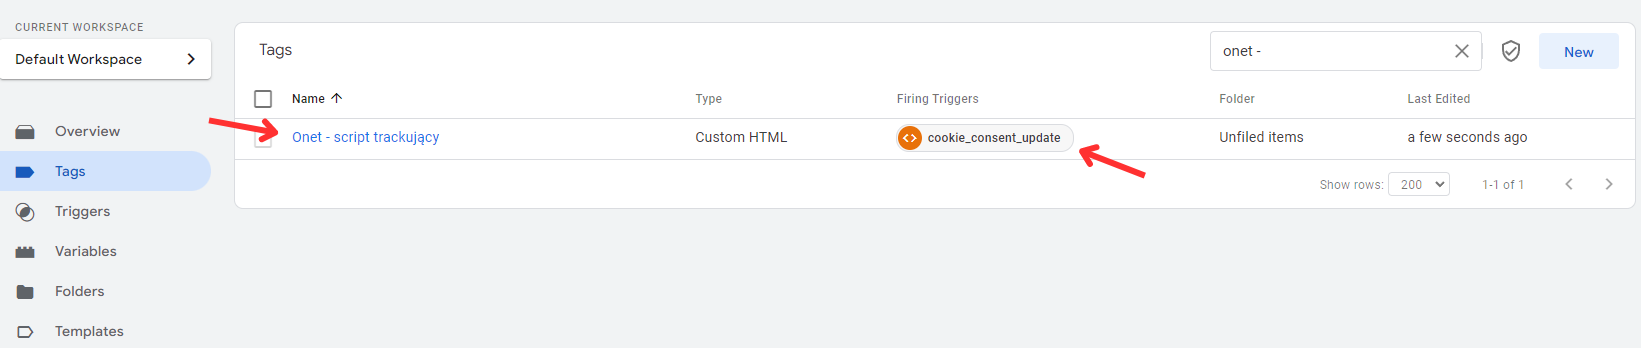
16. Some tags that are not related to the Google ecosystem, such as the “Onet tracking code”, require special settings. In this section, allow additional permissions.

17. The added tag will be visible in the section below:
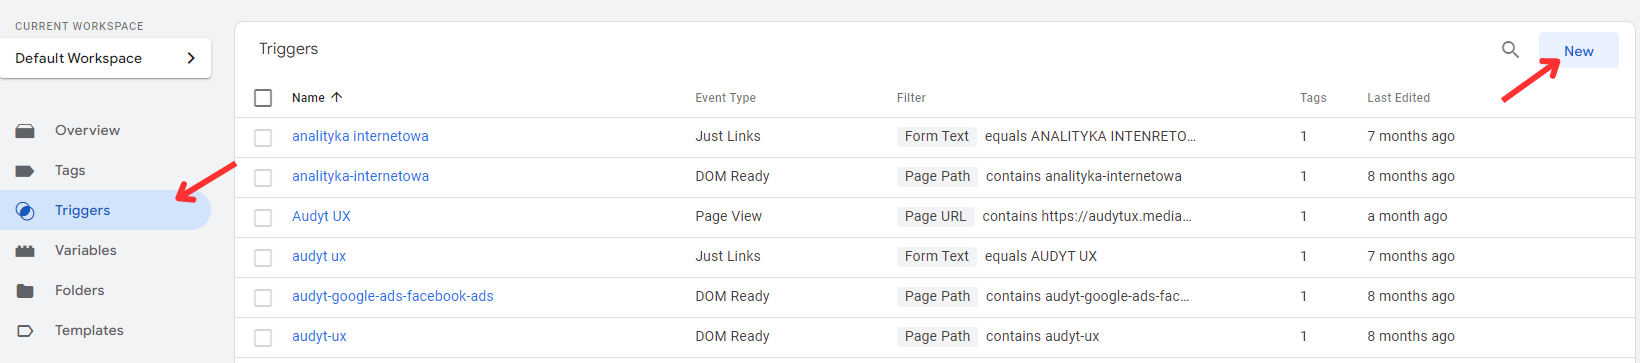
18. To ensure that tags from outside the Google ecosystem are only activated with your explicit consent, you need to create an additional rule. Go to the “Rules” tab and press the “New” button.
19. Create a rule named “cookie_consent_update” and configure it to run for all custom events. After the configuration is complete, press “Save”.

20. Then, for all non-Google tags that use the “All Pages” rule, change it to the newly created “cookie_consent_update” rule.
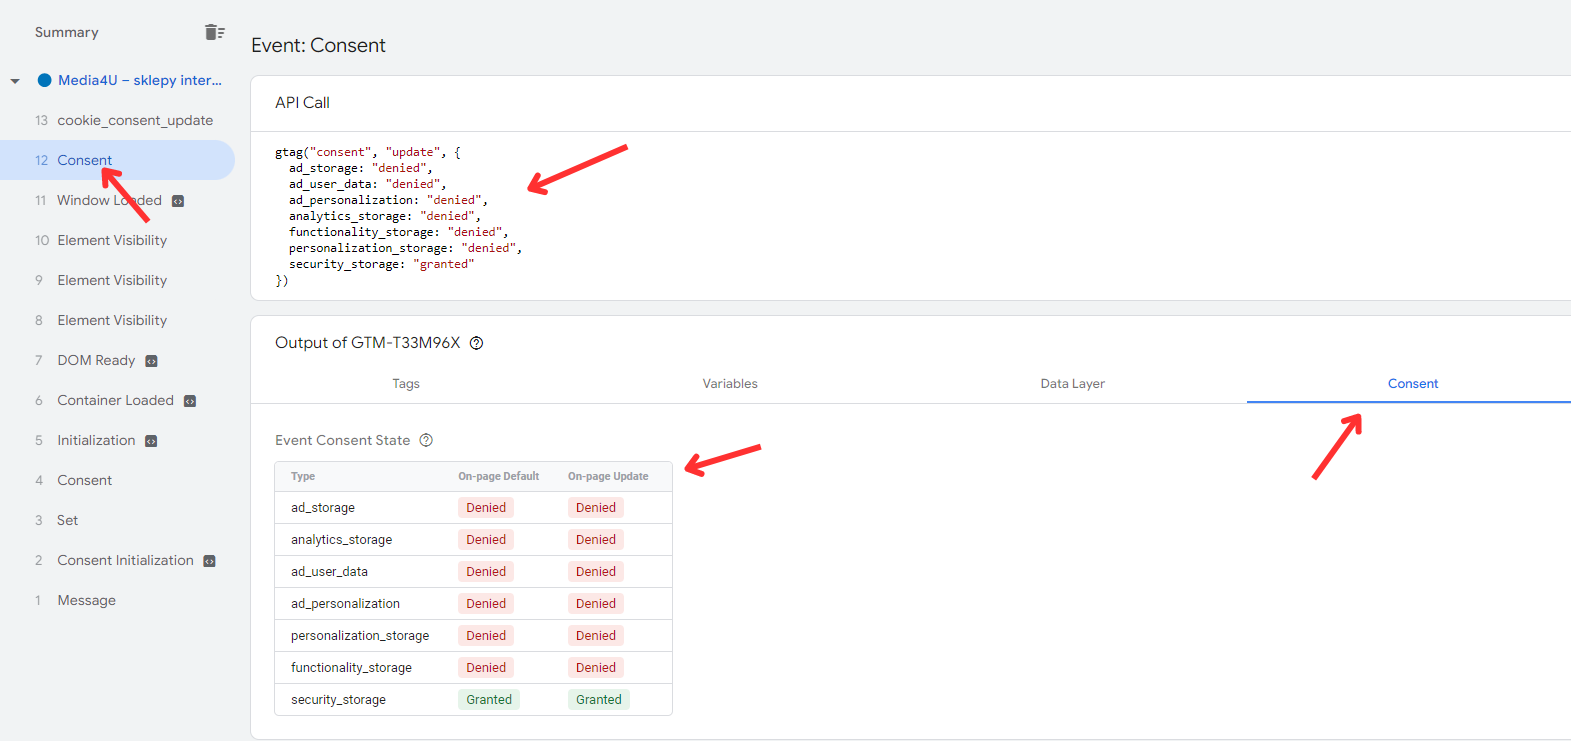
21. At the final stage, it is necessary to check whether the configurations in Tag Manager and Cookiebot are working properly. Click on the “Preview” button, enter the address of your website and evaluate what consents look like before you actually give them. Look for the “Consent” tab on the left, then the analogous tab on the right. There, a list of parameters will be displayed along with information on whether consent has been accepted or rejected.
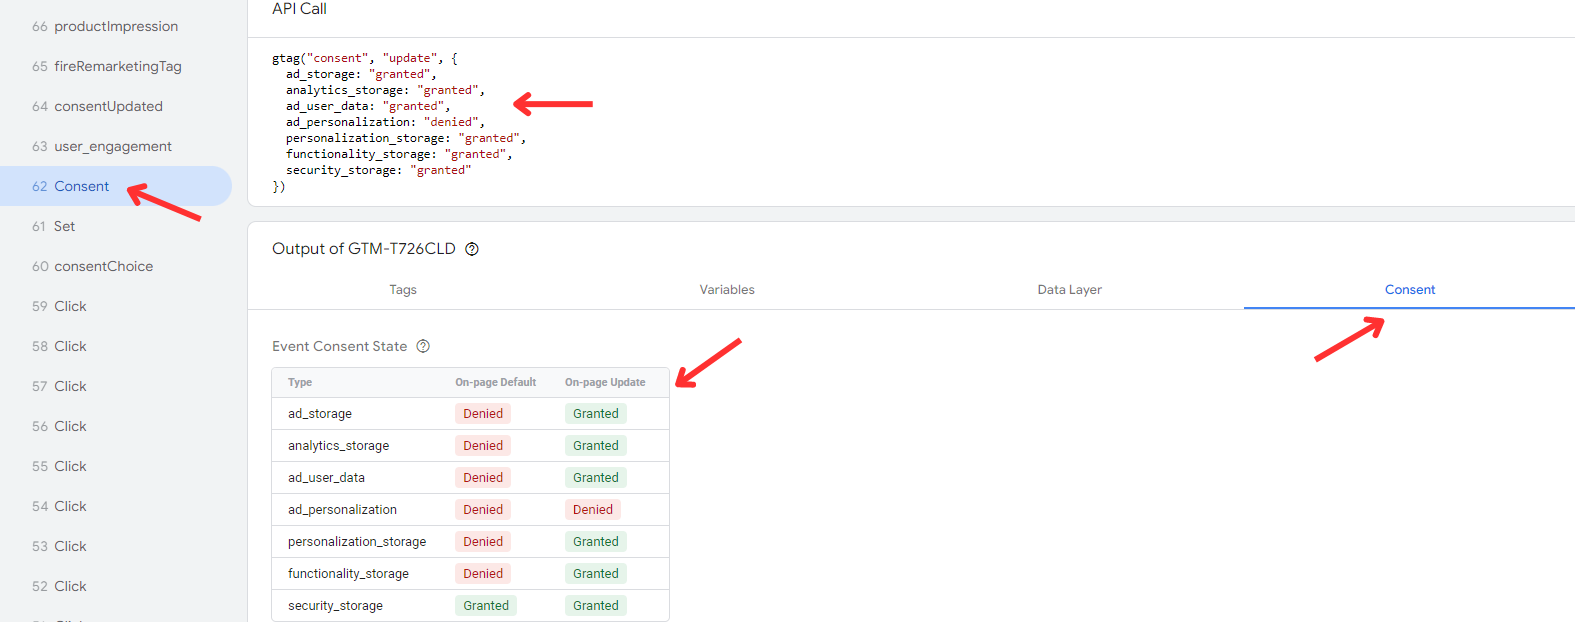
22. Then give a consent to all or selected types of cookies and check the effect again using Tag Assistant. In this example, I opted out of consent for tracking the effectiveness of ads.
Now it should be right! If you have any questions about the functioning of Consent Mode, we are here to dispel your concerns. What’s more, we’ll be happy to give you valuable advice that will help you grow your business without any reservations.
Read more: Online Campaign for small businesses: What to consider when choosing an agency?
Michał Karpiesiuk
Web Analytics Specialist


